|
<< Click to Display Table of Contents >> CALLMGR CRM / Sales Rep's Call Manager |
  
|
CALLMGR CRM / Sales Rep's Call Manager
|
<< Click to Display Table of Contents >> CALLMGR CRM / Sales Rep's Call Manager |
|
This Maxim app is about helping sales reps and their admin people to:
| • | Keep people informed. |
| • | Prompt some actions and follow ups. |
| • | Provide standards. |
| • | Provide accountability. |
| • | Make information available to the sales rep so the rep is fully informed on his customers. |
| • | Make information available to the sales rep so the rep can increase his customer’s spend. |
Where to start
| 1. | Go to ROC / User | Inquiries | My Contacts |
A contact group for the Sales Rep is required. This group is a list of the customers to
be managed by the sales rep.
There are a number of options available from this screen to help with creating a
group, including the ability to filter contacts by the clients attribute tables.
Tick the My Call List column to recognise the group as a call list.

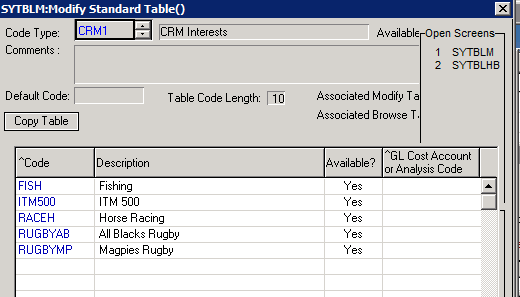
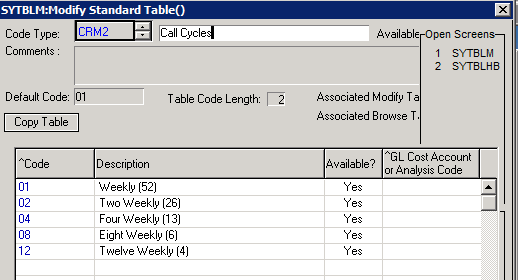
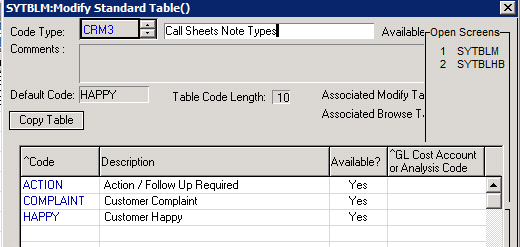
| 2. | Standard Tables Required |
Three standard tables are required for each participating company. The contents of
tables CRM1 and CRM3 can be set as appropriate.
Table CRM2 must be set as shown.
.
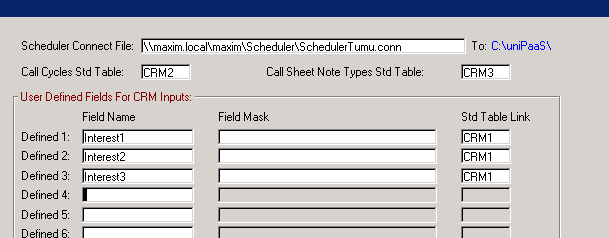
The initial setup of the following screen is required. Access this screen from the My Contacts screen using the Key Accts Set Up button.
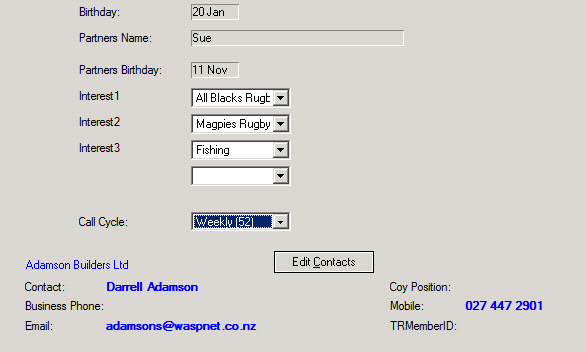
| 3. | Key Accounts CRM Info |
Access screen from the My Contacts screen using the Key Accts CRM Info button.
Now that there is a key accounts / sales rep call list and the Key Accts Set Up has
been completed the Call Cycle and other.
CRM information can be updated.
The Call Cycle will default to the Default Code set for the standard table, so this
is the priority setting to be made.
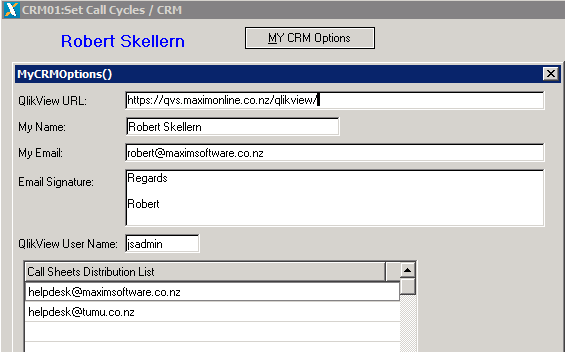
This screen also has access to settings specific to the sales rep. Access this screen by
using the MY CRM Options button.
Complete the screen input that is appropriate for the sales rep. Enter the email
addresses for the sales rep call sheets distribution list.
My Call Schedule
My Call Schedule is a graphic scheduler where call cycles can be maintained, call sheets can be updated and distributed
and access to QlikView is available. See the Learn More… help on the Graphic Scheduler.

Update Call Sheets
This screen enables call sheets to be maintained and distributed. The appointments listed are from the Scheduler for the date range selected.
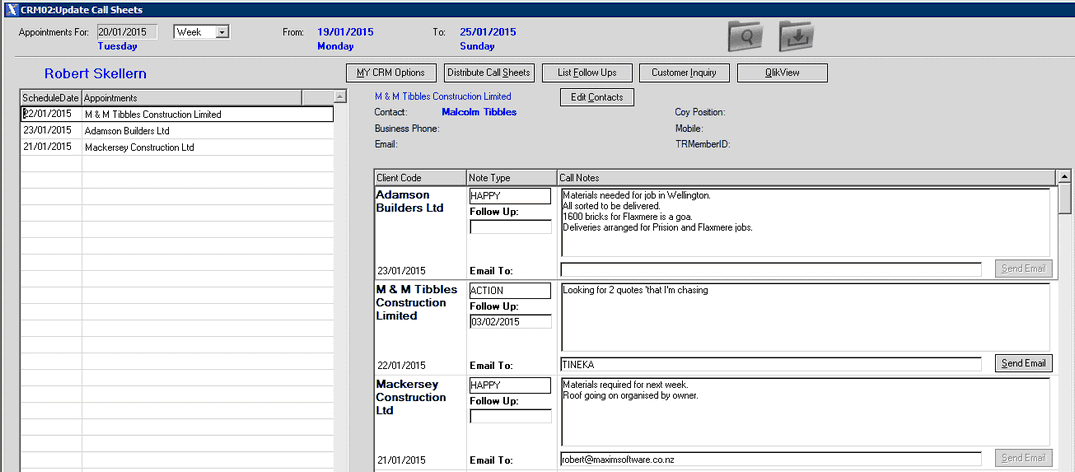
Appointments For: date will default to today’s date. F5 from this field to select another date. Select Week for a week view or Day for the date.
Complete the Call Notes. The note can be emailed to someone and a follow up date can set. Multiple call sheets can be created for a customer.
Press F4 from an existing sheet to create a new sheet for the customer.
MY CRM Options: Open the screen to view / modify the Call Sheets Distribution List.
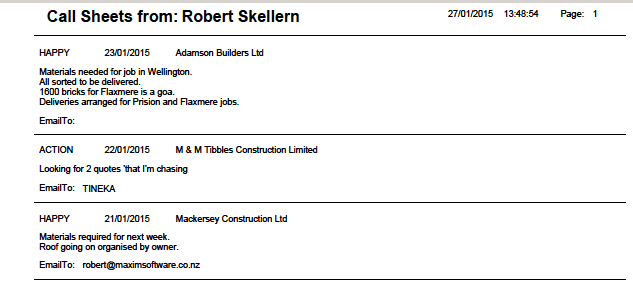
Distribute Call Sheets: Create a pdf of the call sheets listed and email the pdf according to the distribution list. The Call Sheets will be added to
the drop files folder.
List Follow Ups: List follow up call notes.
Customer Inquiry: Open the Customer Inquiry screen for the selected customer.
Edit Contacts: Update contact details.
QlikView: Open QlikView to view sales, quotes, job/quote comparisons and sales orders for the customers in your key accounts call list.