|
<< Click to Display Table of Contents >> WIZ5 Branch End of Day Procedures |
  
|
WIZ5 Branch End of Day Procedures
|
<< Click to Display Table of Contents >> WIZ5 Branch End of Day Procedures |
|
Background
Point of Sale transactions are recorded during the day by the sales people and can be either charged to a customer’s account directly or entered as a Cash Sale. The payment for cash sales are entered on the payment screen when the sale is recorded.
The customer will have paid for the goods with cash, cheque, EFTPOS or credit card.
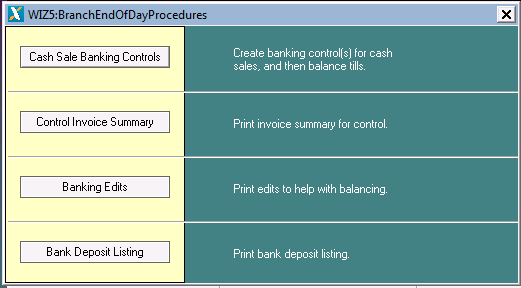
PROCEDURE
Cash Sale Banking Controls
| 1. | The first step is to create the banking controls for the POS receipts and balance these receipts against the tills. This can be done either based on a range of invoice numbers or based on a date range. |

Once you have entered the date range or invoice number range, the “Cash, Chq’s, EFTPOS: $” field will be updated with the recorded receipts for the range.
| 2. | (Optional) You now have the option to press the “View” button to see a list of all the receipts, here you can review the receipts and select any payments that are not in the till or that you don’t want added to the banking control. |
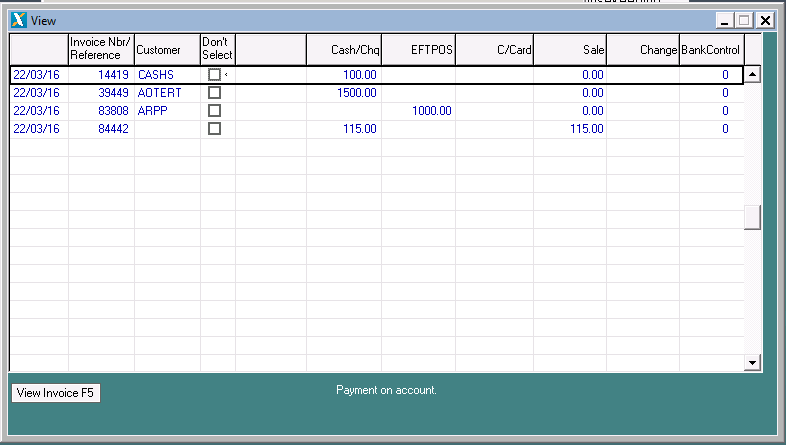
NOTE #1: When arrowing up and down Credit Card and Cheque lines you will see details about the payments, as entered on the receipts.
NOTE #2: If you are banking funds into two different accounts then you only want to select the transactions that are going into the account you want to create the control for first.
(E.G: If you are a business who doesn’t bank cash into your bank account straight away and have a GL account setup for the cash received / held then you would not select these transactions to add to your bank control, these would be selected on a separate control for your cash account.)
| 3. | Next press the “Continue” button this will bring up the Create Control screen to setup the control. This is where you select the account the funds are to banked into. |

F5 on the “Control Account” field to bring up a list of the GL Accounts, select the GL Account that the funds in this control are going to be banked into.
NOTE: If you have other receipts that need to be added to a separate control / separate GL Account, repeat the above steps for “Cash Sale Banking Controls”, this time when you view the receipts unselect the receipts so they can be added to the control.
The system has now created a banking control(s) for cash sales, cheque(s), EFTPOS and credit card transactions. The payments have been processed to the appropriate customers accounts.
Control Invoice Summary
The Control Invoice Summary allows you to select your Invoice Controls and print a listing of all the Invoices in those controls.
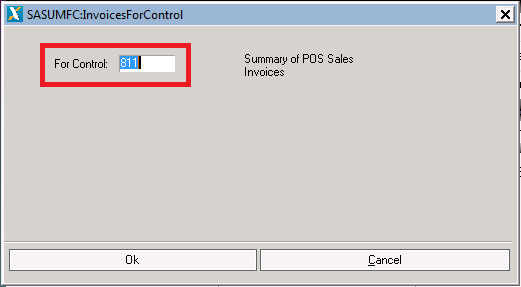
F5 in the “For Control” field to select the control you want to run the report for.
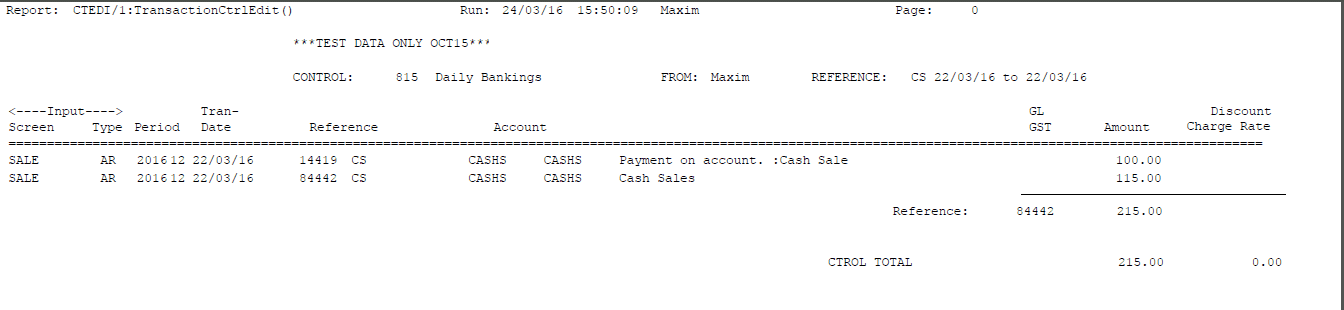
Banking Edits
Banking edit reports are used to help with the reconciliation between the till tapes and the daily banking’s. The report itemises cash, cheque, EFTPOS and credit card transactions which could be matched to a till tape if required.
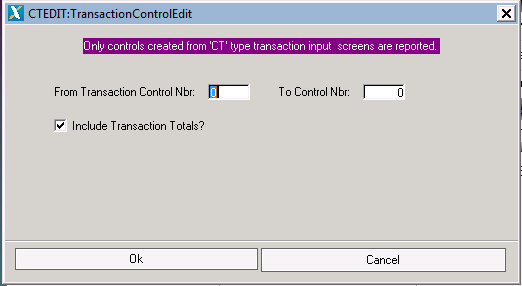
The Transaction Control Edit screen allows you to select a range of Banking Controls, if you processed multiple controls in the above “Cash Sale Banking Control” step you will be able to select both of these controls.
Each control will be printed on a separate page.
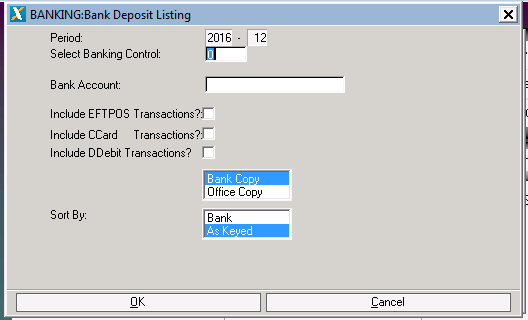
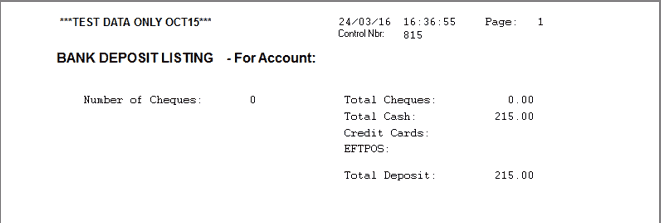
Bank Deposit Listing
The bank deposit listing can be taken to the bank with the cash and cheque’s to be banked. You can produce both a bank and office copy.
Closing Banking Controls
It is best practice to close banking controls each day after you have finished the above process. If the control is left open the next day’s banking’s will be added into the open control, also the controls / transactions will not be pulled through to the bank reconciliation until they are closed.
To close the banking controls go to Sales/Customers | Maintenance | Transaction Controls
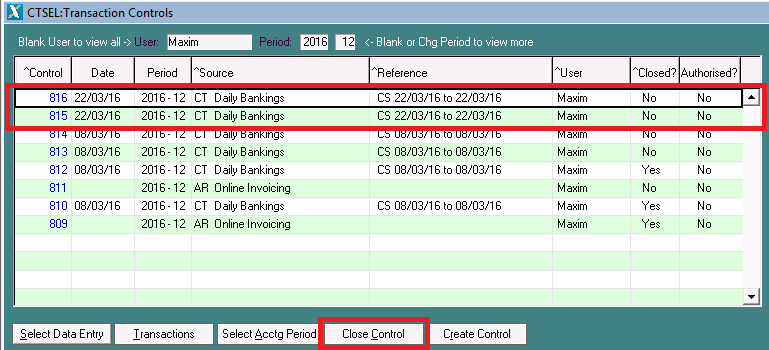
Select the control you want to close and then press the “Close Control” button at the bottom of the screen.